If you’re looking to transform an old PC or a dedicated machine into a robust, flexible, and feature-rich home server, you’re in the right place. In this guide, I’ll walk you through setting up OpenMediaVault (OMV)—a powerful, open-source NAS solution—enhanced with the ZFS filesystem for rock-solid snapshots features and performance. We’ll also take it a step further by installing the Proxmox kernel for better hardware compatibility and ZFS support, adding essential plugins to extend OMV’s capabilities, and creating dedicated user accounts to keep your server secure and organized.
Whether you’re a seasoned homelab enthusiast or just starting your self-hosting journey, this tutorial will give you a clean, modular setup that’s easy to manage and ready to scale.
Let’s dive in and turn your hardware into a storage powerhouse.
Let’s first see what are we getting ourselves into. ZFS is a volume manager, which handles both how data is stored and how it’s organized
Features
- Data Integrity - Uses checksums to detect and correct silent data corruption
- Snapshots & Clones - Create instant, space-efficient backups or test environments.
- Self-Healing - Automatically detects and repairs corrupted data using redundant copies.
- Compression & Deduplication - Saves space and improves performance in many scenarios.
Considerations / Downsides
-
Memory Usage: ZFS is RAM-hungry. A common recommendation is 1 GB of RAM per 1 TB of storage.
-
Complexity: More features mean a steeper learning curve.
-
Not Native on Linux: Due to licensing, ZFS isn’t built into the Linux kernel, though it’s widely available via packages.
It’s ideal for a Home NAS
My current configuration is the QNAP TS-264 NAS:
- Processor: Intel® Celeron® N5095 2.9Ghz
- Bays: 2
- RAM: 8GB DDR4
- Ports: 2 x USB 2.0
2 x USB 3.2 Gen 2 Type-A
1 x HDMI 2.1
OMV installation steps
Let’s now go through each step of installing OMV on your machine
-
In order to install OpenMediaVault, flash the ISO image to an USB using Rufus, Balena Etcher or the media writer of your choice.
-
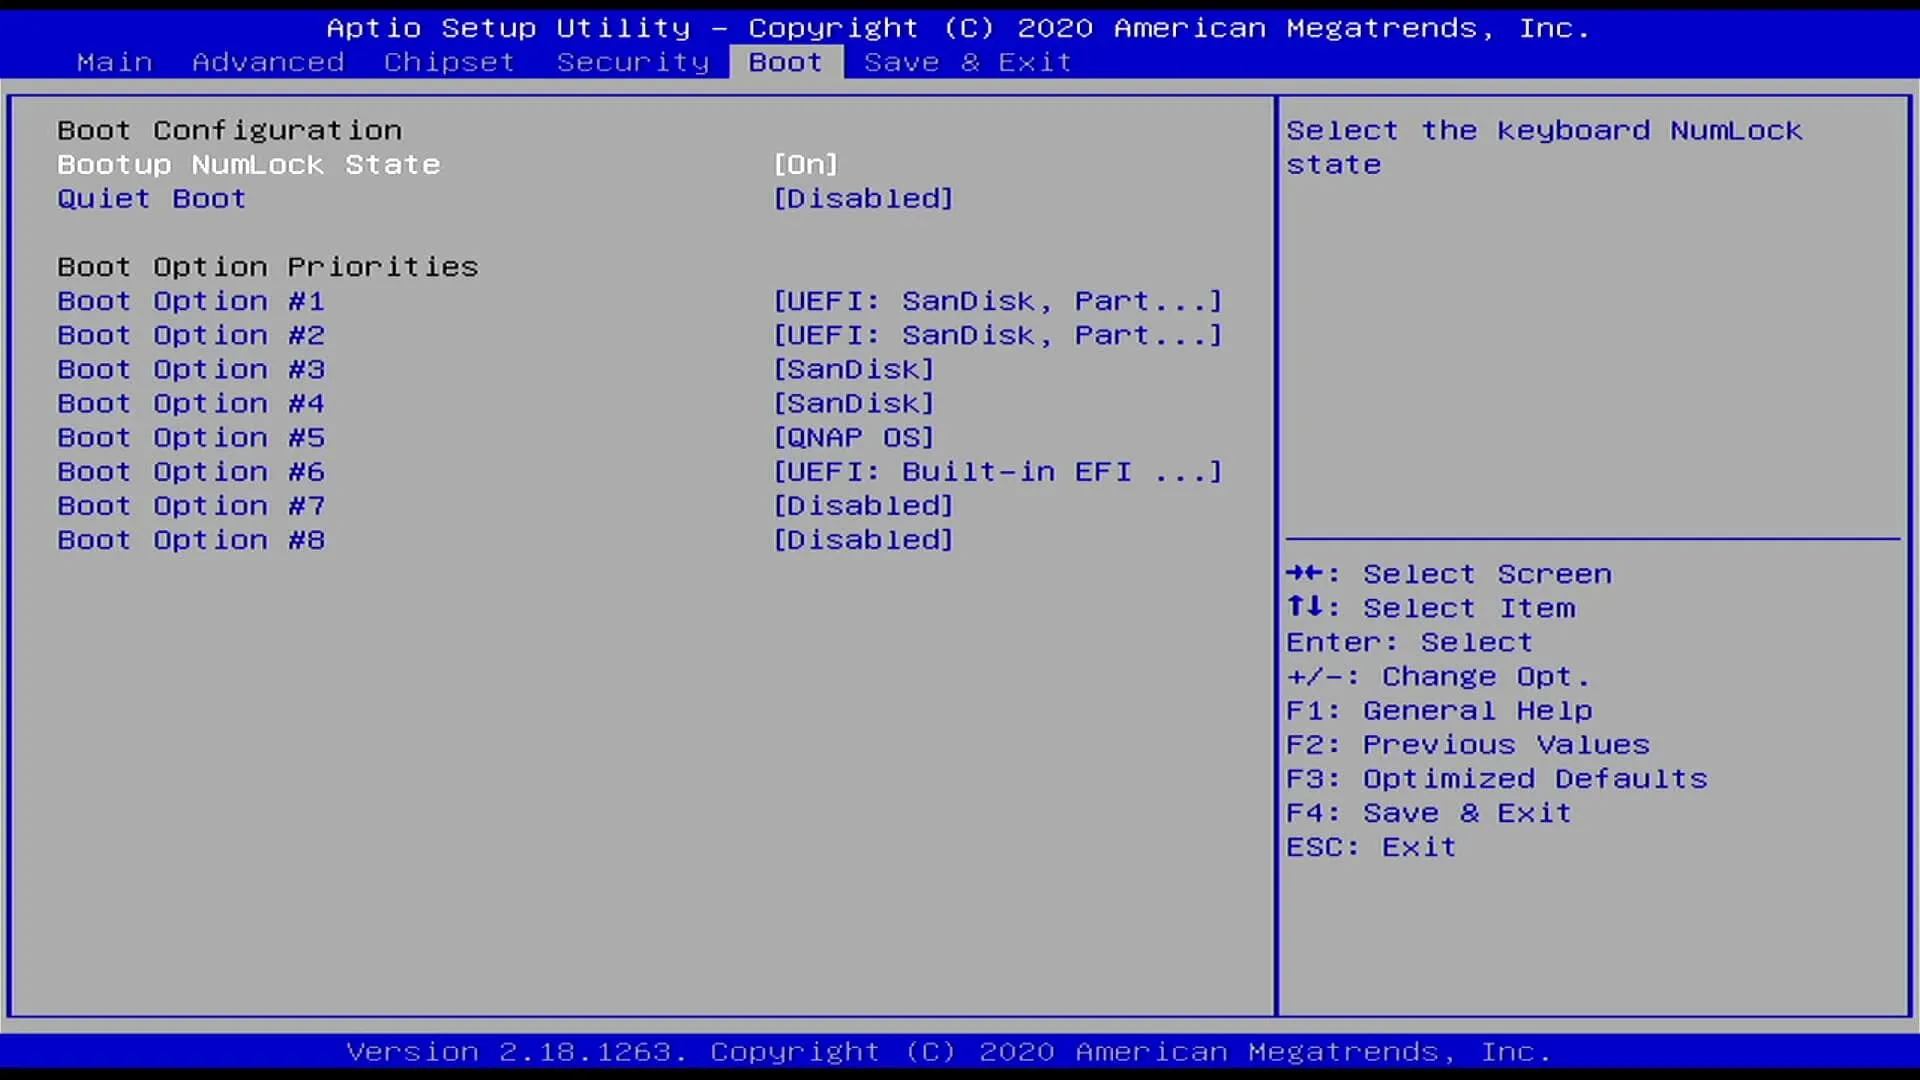
Shut down the NAS completely and plug a mouse, keyboard, a monitor and of course, the USB with the ISO image. When you start up the NAS again, mash DEL key until you arrive in the BIOS
-
Go to the Boot Menu and make sure QNAP OS isn’t going to be the first option when booting, but the installation media (USB)
-
Save Changes and Reset
-
The NAS should boot to the installer, and you can follow the steps from there.
-
Since the NAS also has an NVME slot, I have installed OMV there
-
Make sure that when you restart again after setup, go back to the BIOS and set the Boot Option #1 the media where you installed OMV.
- After the installation is done and the system rebooted, you will be met with a Terminal screen that looks similar to this:
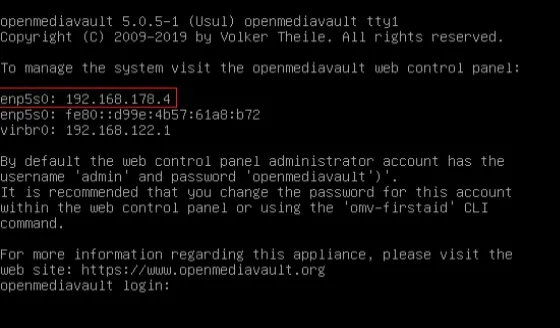
The highlighted IP address is the user’s network you use to navigate to a browser and visit the OMV Interface. So in this example type http://192.168.178.4 in your browser and congratulations, you now have OMV installed on your NAS:
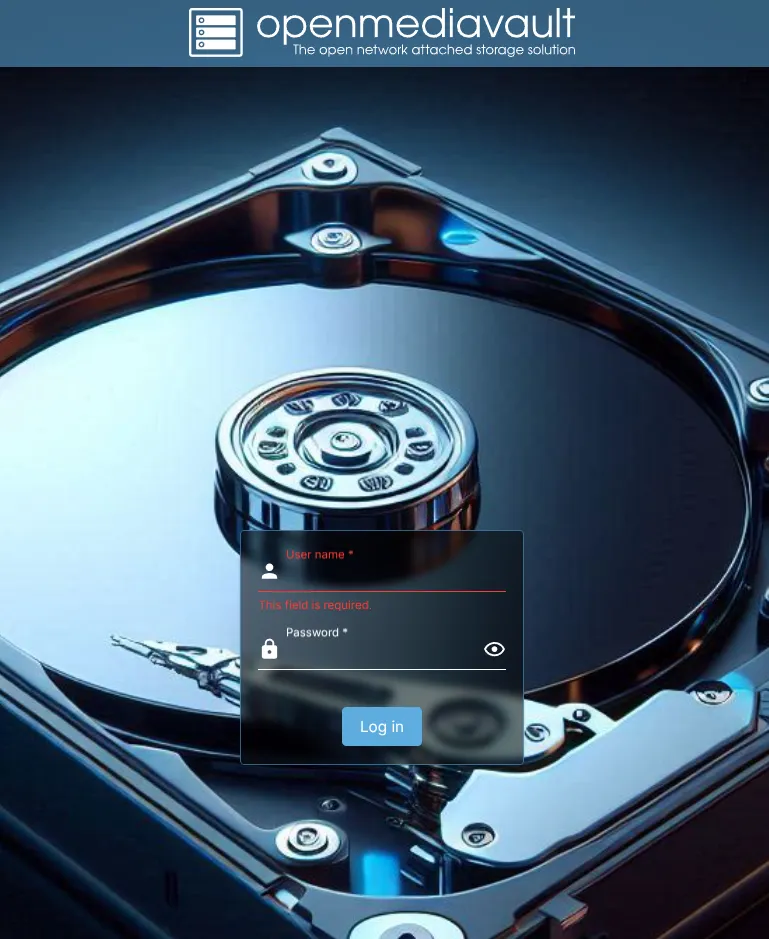
The default login credentials are:
User Name: admin
Password: openmediavault
- You can now safely remove the mouse, keyboard, monitor and USB stick from the NAS
Installing omv-extras
Before actually logging in, let’s first install omv-extras. This greatly extends your server functionality via it’s plugins. We need this since ZFS is not built into the OMV kernel, or the Linux distribution in general.
Let’s first SSH into the server, shall we? Open a terminal window and type
ssh root@192.168.178.4or whatever IP Address your home network has. You will be prompted to insert the password, the same password you created during the installation of OpenMediaVault.
Go to the omv-extras.org website for the updated command, but for simplicity sake I am going to drop it right here:
wget -O - https://github.com/OpenMediaVault-Plugin-Developers/packages/raw/master/install | bashFirst OMV login
Change your password
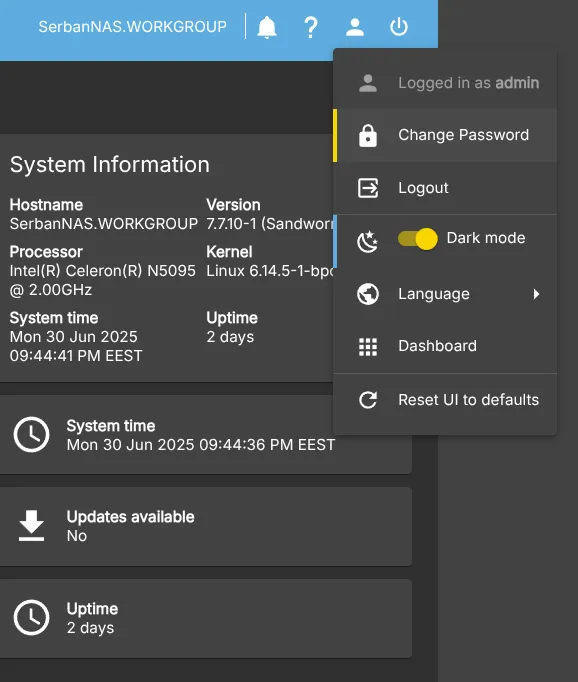
Let’s now login to OMV using the default username and password described above and the first thing we are going to do is to change this password. Having a default is never a safe thing!
So go to the upper right corner User settings button and click Change Password. You will keep admin Username but the password will be your own. So, next time you login to your NAS using the web interface, use your new password. Please remember, this is not going to be the root password we used to SSH to the server before
Customize your dashboard
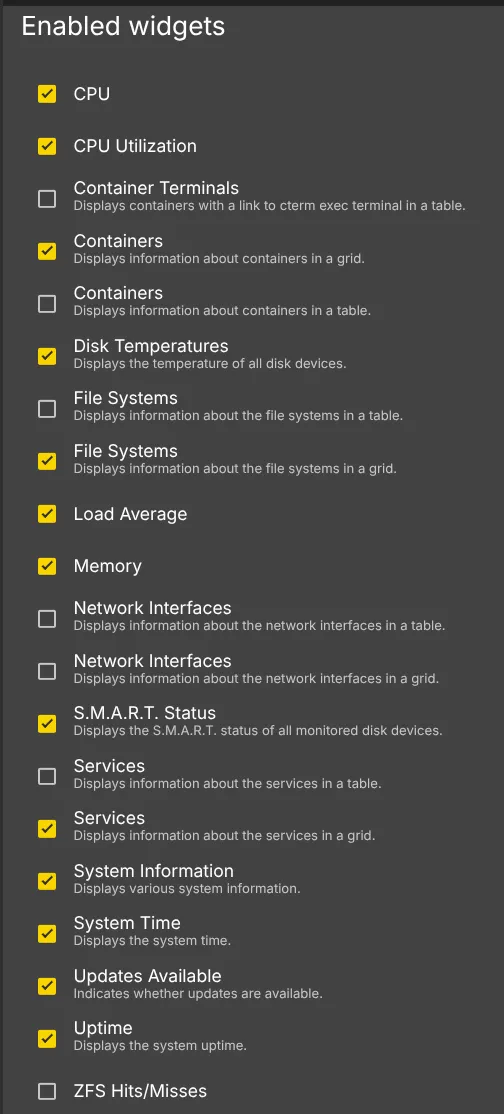
If you wish to have your Dashboard look like mine, go the User Settings and click Dashboard. These are the widgets I have enabled:
Enable Secure connection
In order to enable Secure Connection you need to create a Certificate, So go to Certificate from the left menu -> SSL and click the button to create a new Certificate:

Put in a long Period of Validity so you don’t have to renew the certificate often, like 5 years. You are also prompted to input a Common Name, you can leave it like this, which is usually the network IP address, your make it your own. Click Create.
Go to System -> Workbench and under Secure Connection check SSL/TLS enabled checkbox. From the dropdown menu, select your newly created Certificate, leave port as 443 for https and check Force SSL/TLS. From now on, when we visit our web app, you can use https instead of http, for example: https://192.168.178.4
It will say that the connection is not secure, but this is because we have created the Certificate and is not verified. The security advantages of https still applies.
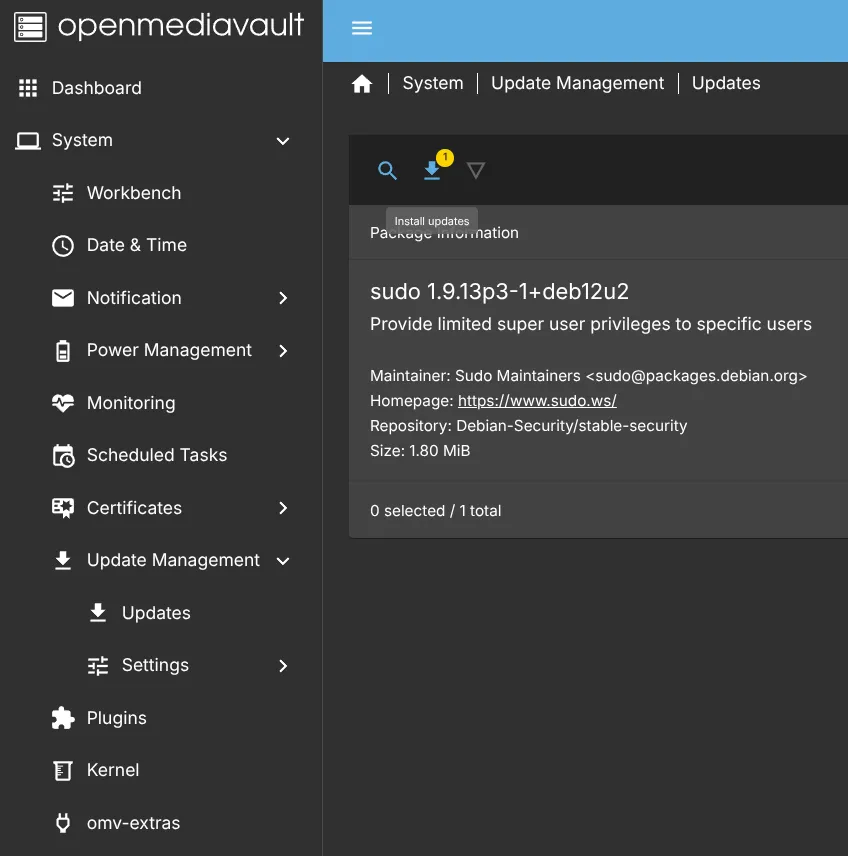
System Update
Next steps you should do for sure is to update OMV. Go to System -> Update Management -> Updates and click the Update Button
If Pending Configuration Changes banner appears again, don’t forget to apply the changes:

A restart of the NAS is required after a full update like this.
Recommended Plugins
There are a series of plugins I recommend installing on a fresh OMV machine and I will present them here. Just go to System -> Plugins and Search for the following:
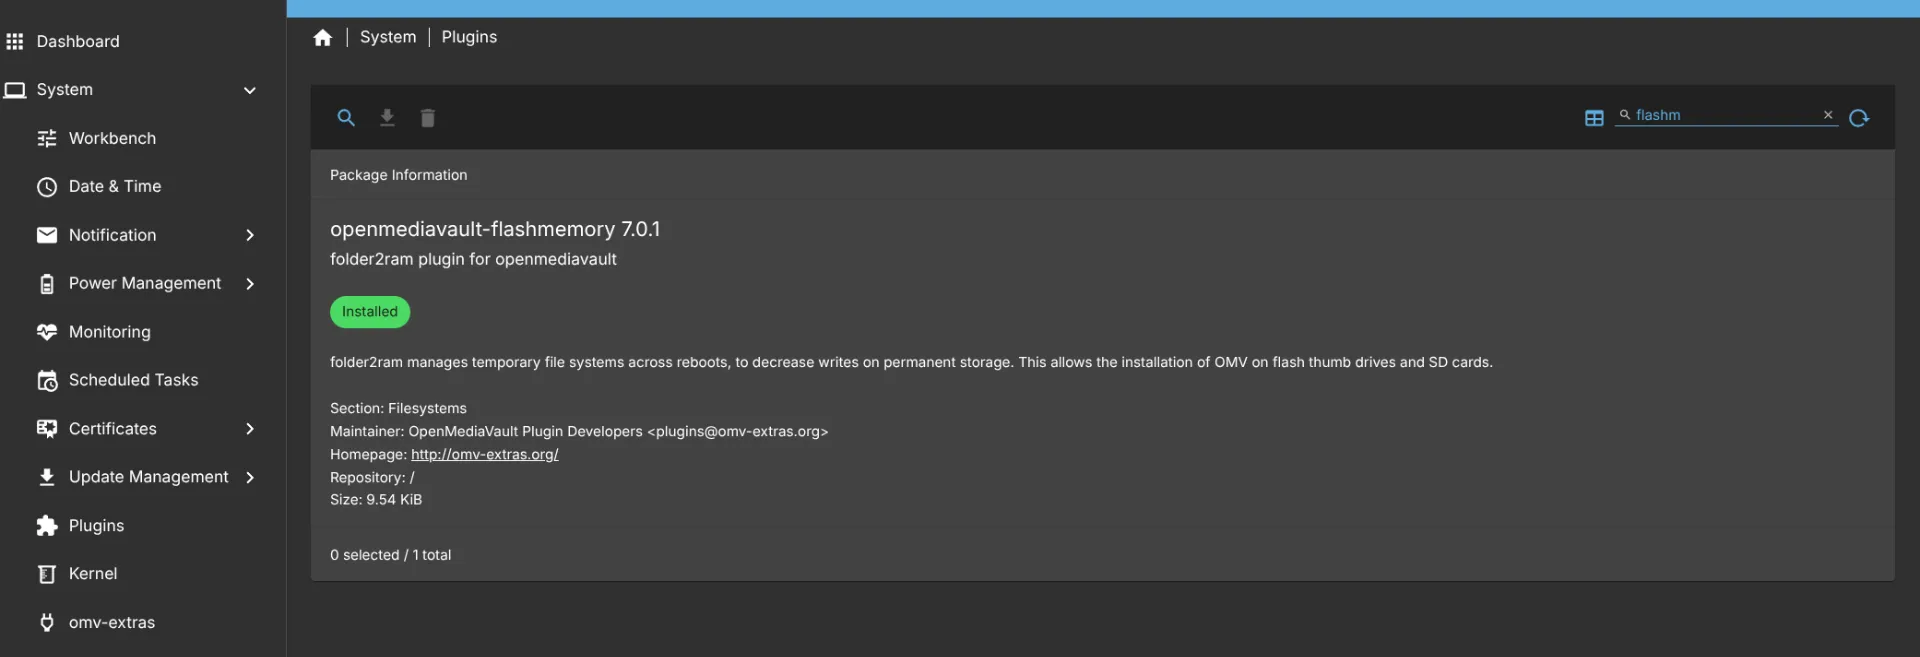
- Flashmemory
This plugin will manage temporary file systems on the RAM instead of using a permanent storage device, so every time you reboot your system, the temporary files will be purged and will not use up your precious NAS storage
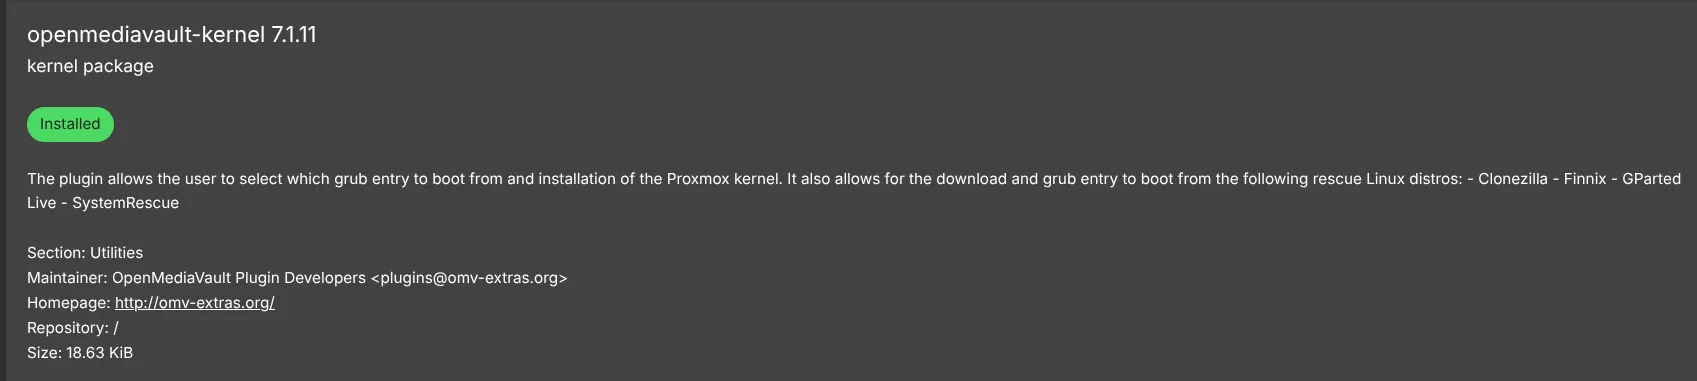
- Kernel
This plugin is very important since this will allow us to install the Proxmox kernel that has full support for the ZFS filesystem we wish to add to our system. OMV kernel doesn’t have ZFS support
- Support for Docker
In order to make our system a true HomeLab system, of course we are going to install containers and self-hosting our own apps. In order to have Docker functionality on OMV, we first have to enable the Docker repository. Go to System -> omv-extras and check Docker repo and hit Save

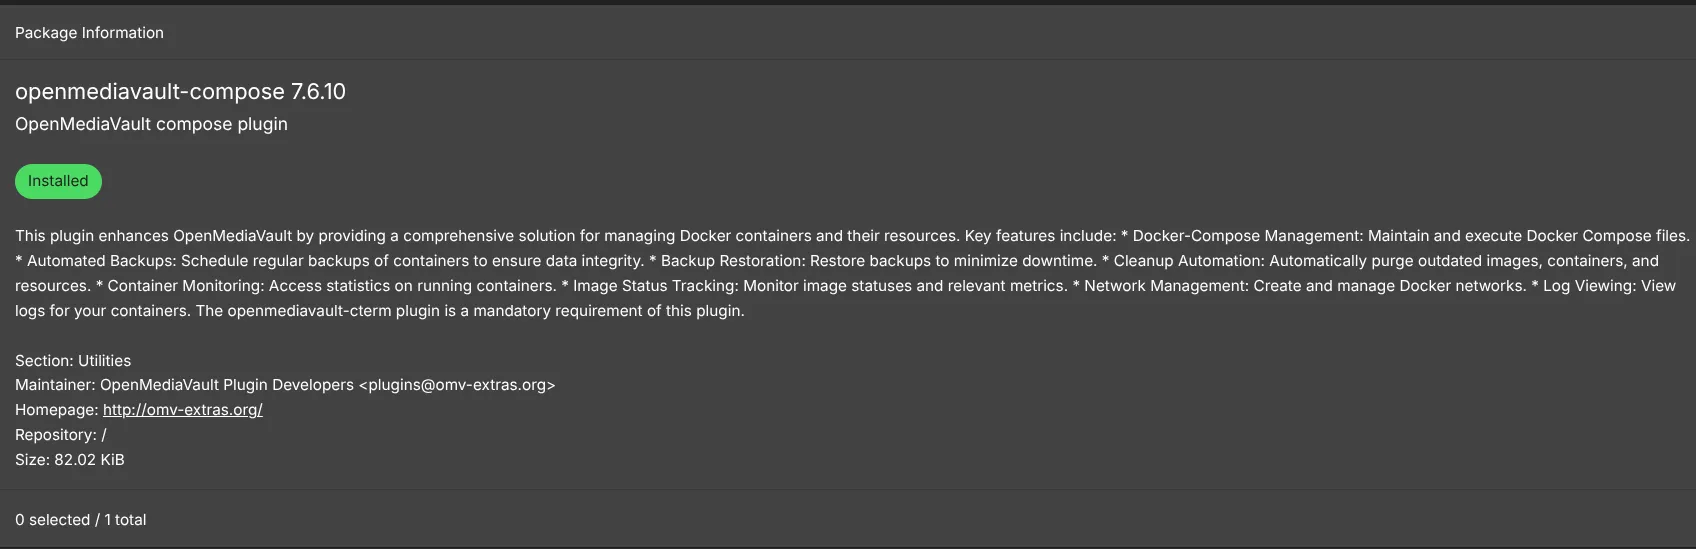
Now it’s safe to go back to Plugins and search for Compose to install it
Install Proxmox Kernel
To take full advantage of ZFS filesystem we need to install the latest Proxmox Kernel. To do so, got to System -> Kernel -> Click Proxmox button and install the latest version of it to begin the installation:
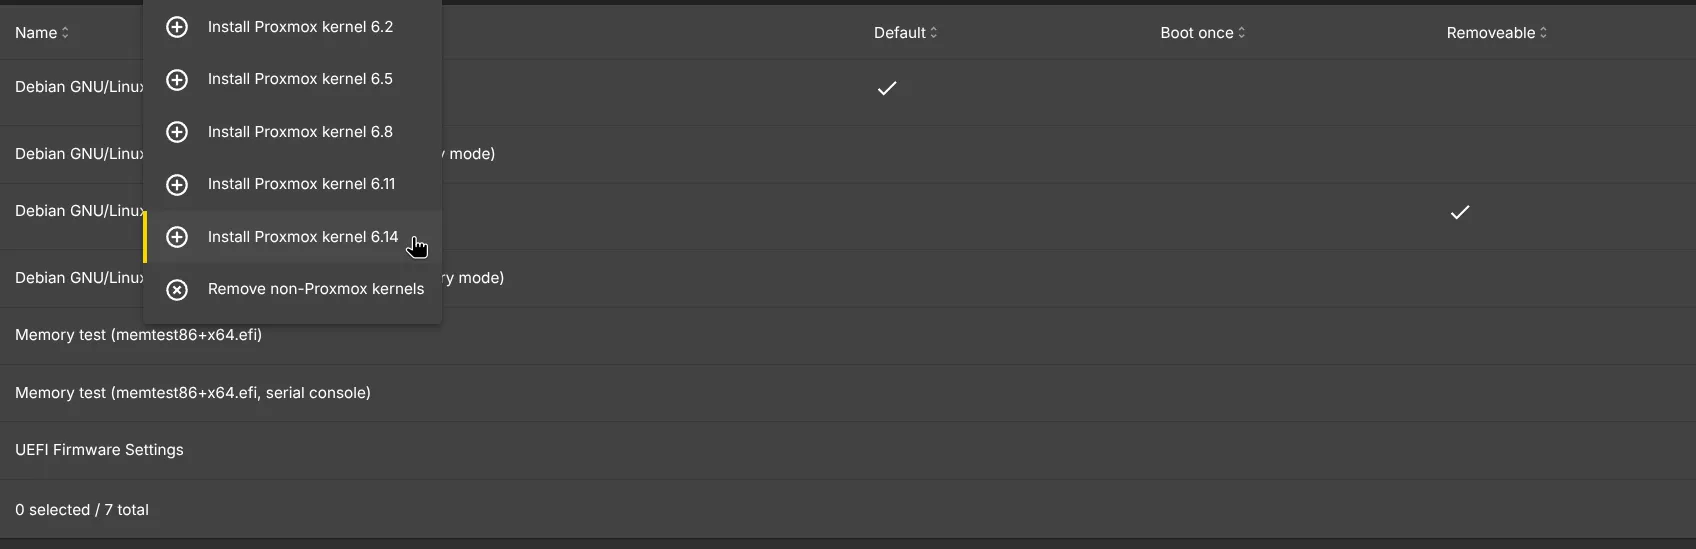
As with all Linux distributions, after installing or updating a new Kernel, a reboot is required.
After the reboot, the new Proxmox kernel should be the one being currently used, but you can go back to this Kernel screen and make sure the Default column for -pve is checked:

Installing the ZFS filesystem
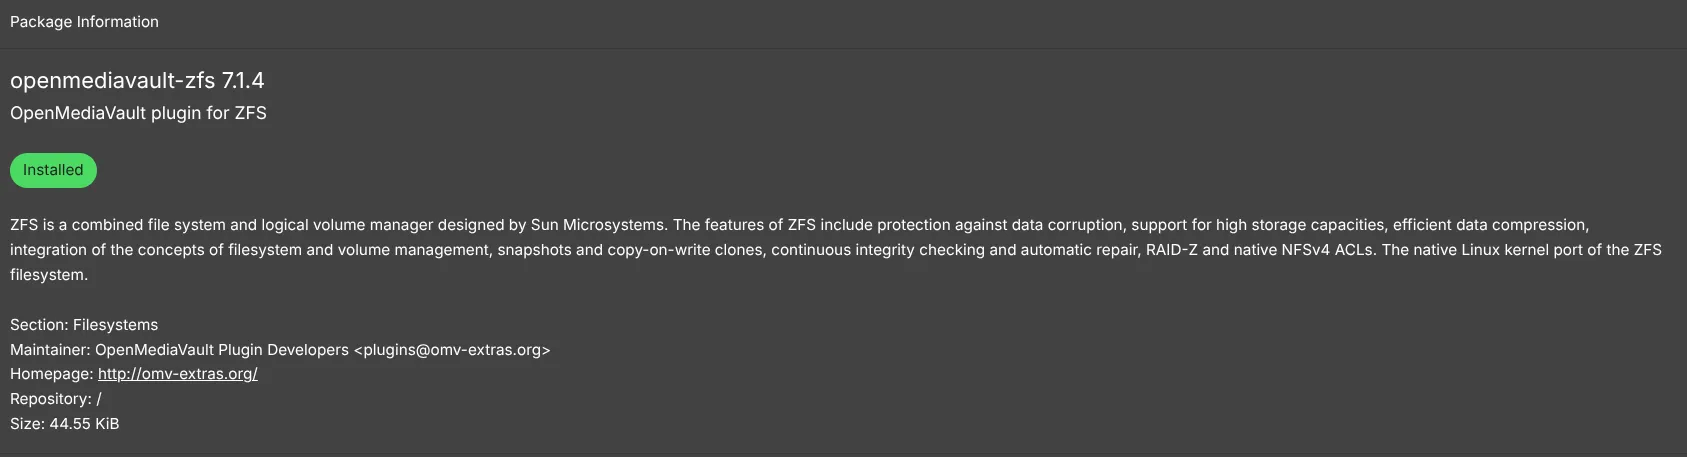
- On OMV, the ZFS is being deployed as a plugin, so go back to the Plugins screen and search for ZFS and install it:
- First let’s go ahead and prepare our storage by going to Storage -> Disks and formatting all disks we wish to structure as a ZFS. Click the Wipe button for each device. Please make sure you don’t wipe the device where you have your OS installed on!

In my case, I have a NVME Samsung SSD drive where I have OMV installed on, I will leave that alone. The other 2 are the hard-disks which I will wipe.
- In order to have a Filesystem, we need to create a ZFS Pool first. Go to Storage -> ZFS -> Pools and click the + button. As a general protocol, we can name our Pool, Tank and select all devices you wish to create the Pool from:
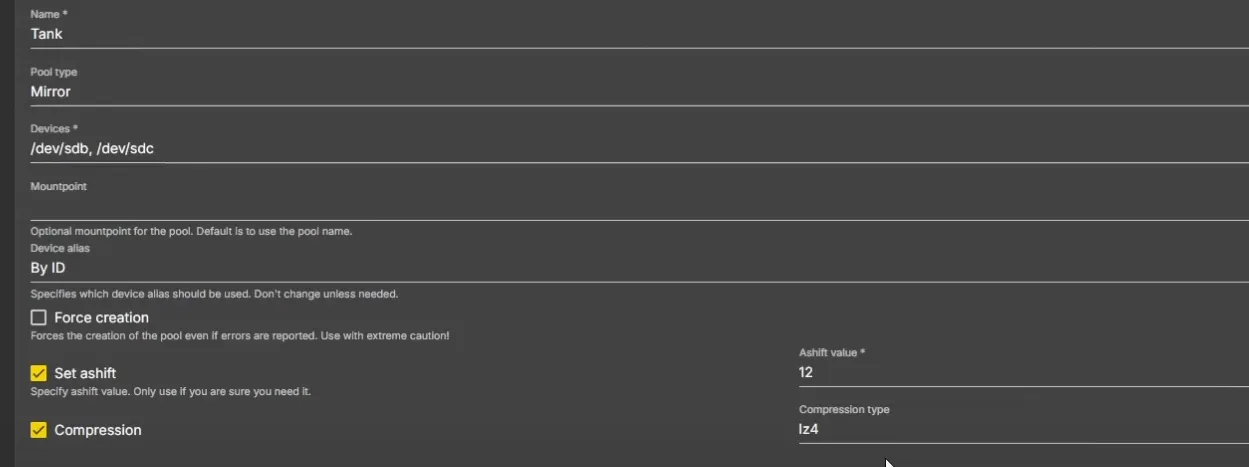
If you use more than 3 hard-disks you use RAID-Z1 as a Pool Type, basically a RAID5. In my case I will choose Mirror, or a RAID1, each disk being the copy of the other. If one disk fails, all my data will remain intact. Of course, the storage amount will be cut in half, but this way I can sleep better at night.
You can also use Compression with it’s most used type being lz4, so I will do the same. Set ashift is optional.
Click Save and Apply Pending Configuration changes
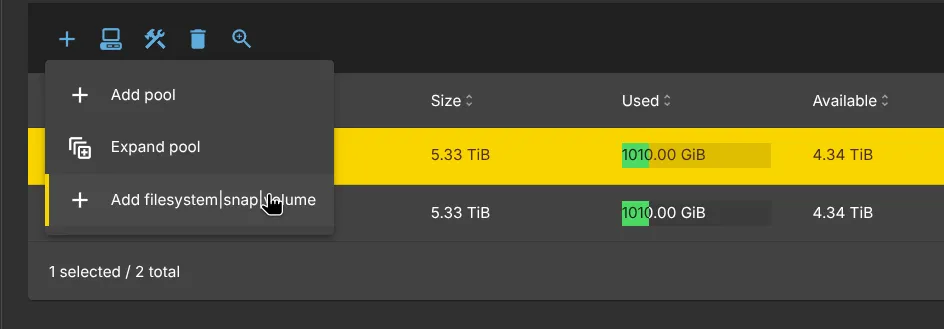
- In order to create a network shared Folder we need to create a Dataset as a filesystem. Select the newly created Tank Pool and click the + button -> Add filesystem/snap/volume
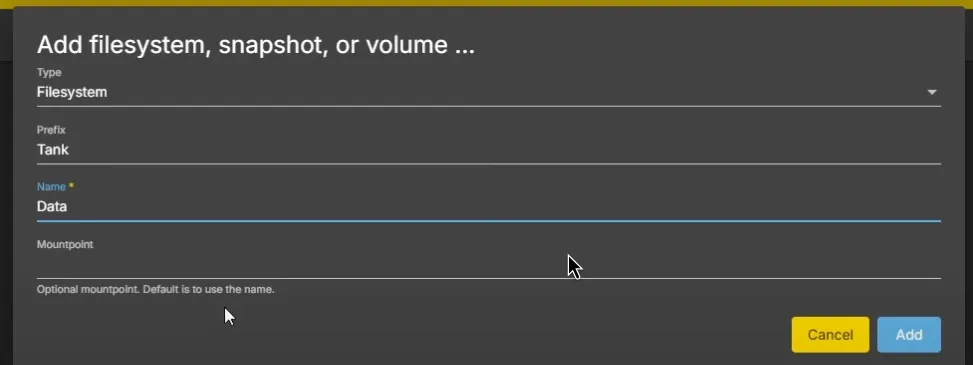
Select Type as Filesystem, Prefix leave as is, you can name it however you like, I called mine Data, mountpoint you can leave empty.
- In order to view the newly created Dataset on your Network, you can go to Storage -> Shared Folders and click the Create button:

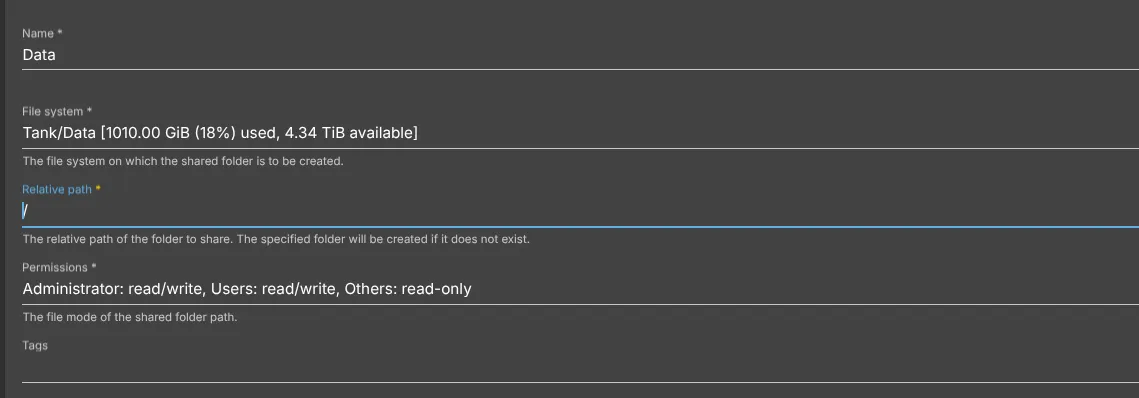
You can name it however you like again, but I kept mine as Data, as for the File System, please select the Dataset, that would be Tank/Data, not the Pool.
Relative path use only / as we want the dataset to be mounted in the root folder so it can be easily accessed. So if you ever SSH into your NAS you can simply cd /Tank/Data and don’t mess around. You can leave Permissions as is, we can change this in the next screen.
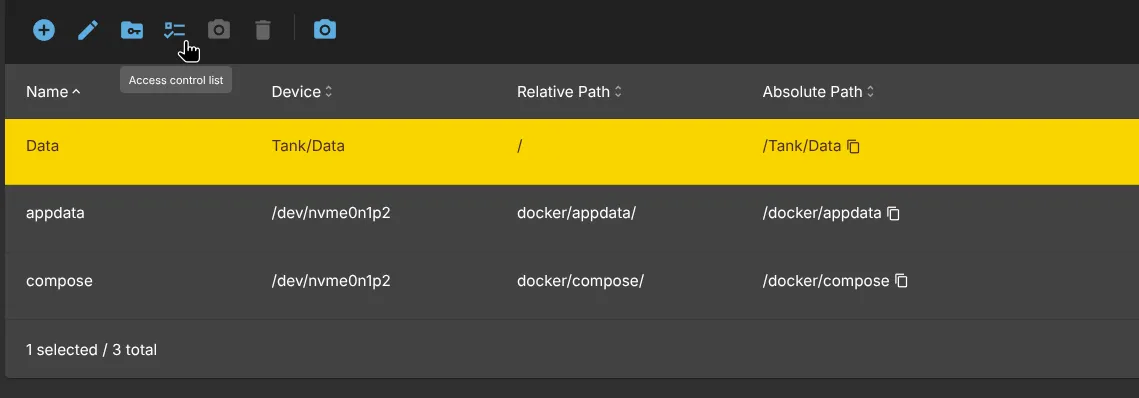
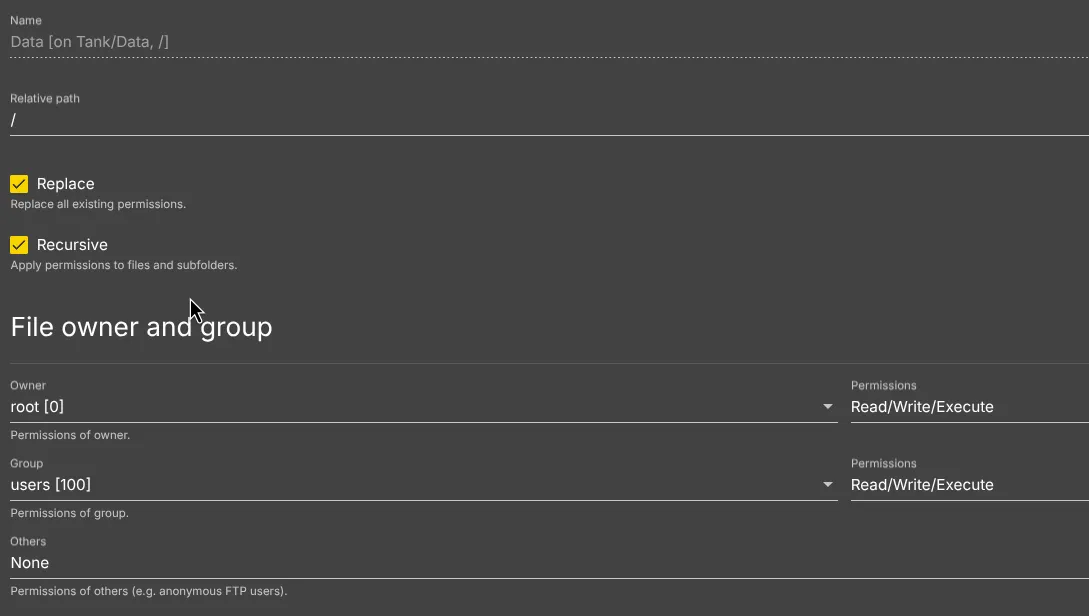
- Please check now the Permissions of the newly created Shared Folder by selecting it and going to Access control list.
Here, you can leave the Root user have Read/Write/Execute permissions I chose the same for Users Group, since in the future we will create a separate user to manage Containers for example, or manage the Shared Folder. If you have guests, you can select for Others Read-only permission. For security sake, I chose no permissions for this. You can check Recursive checkbox to apply the same permissions for all files and subfolders.
- Let’s go ahead to create a User to manage the shared folder. Go to Users -> Users and click the + button:
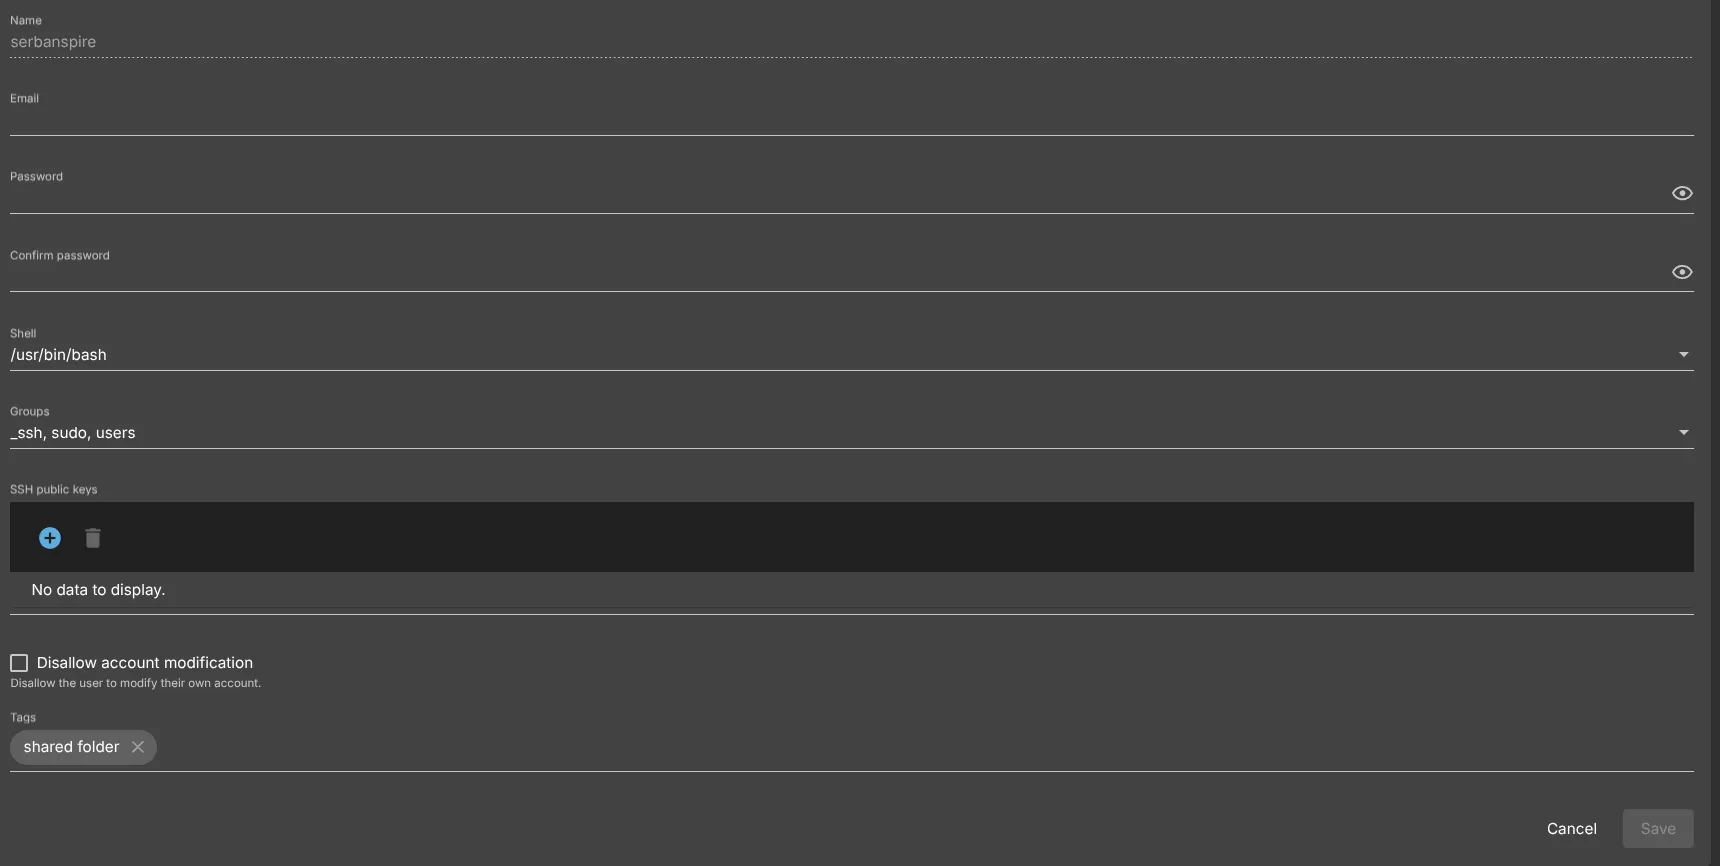
Here you can assign a username, password and permissions groups. I assigned my user the _ssh group, to be able to SSH into my server with this user as well. It is not recommended to SSH into your server with the root user. Sudo group allows you to run root commands during SSH. Of course, the Users group defined for the Shared folder will be assigned as well. To facilitate SSH, select Shell to /usr/bin/bash.
Hit Save and apply Pending configuration changes.
Accessing your shared folder on your local network
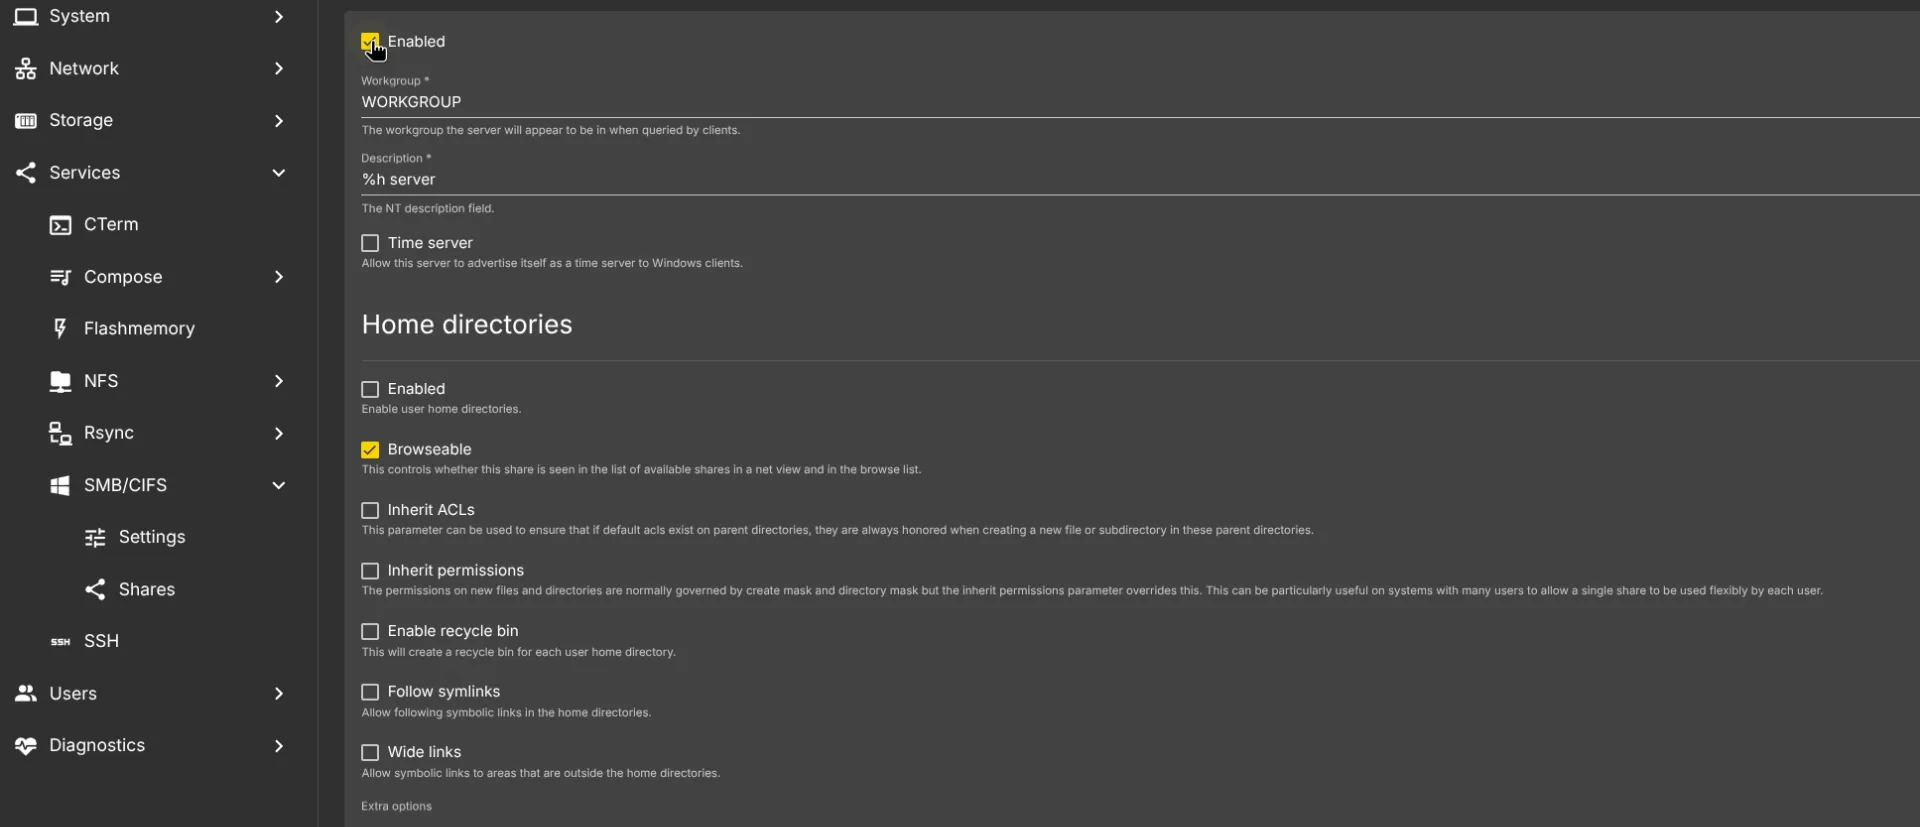
1.1. If you are on a Windows machine or you wish to acces this shared folder on a mix of OSes like Windows, Linux, MacOS, Android or iOS, Enable SMB share by going to Services -> SMB/CIFS -> Settings
Next, go to Services -> SMB/CIFS -> Shares and click Create
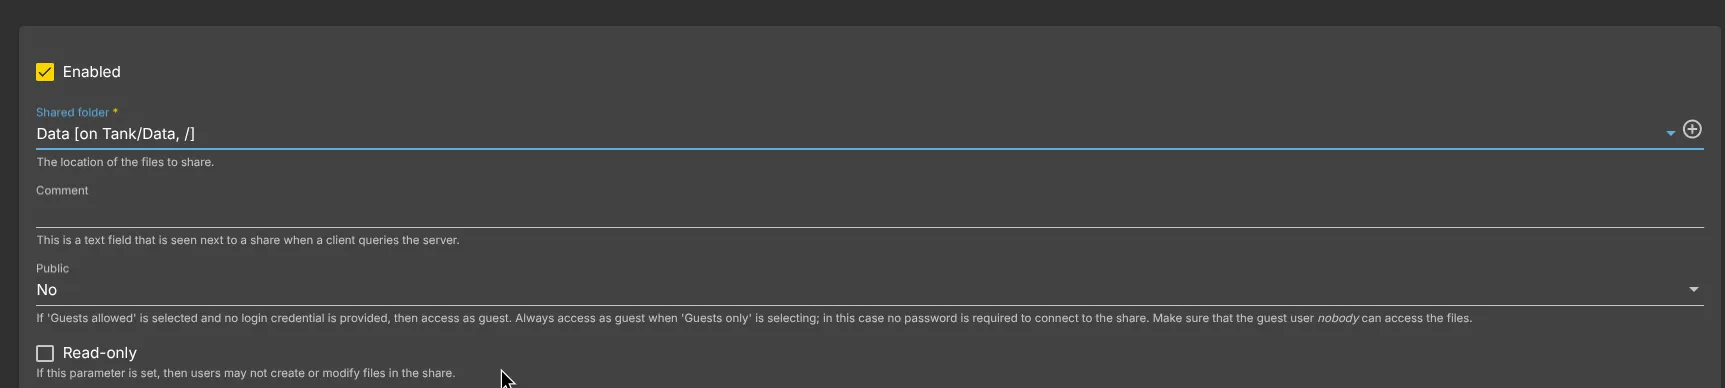
for the Shared Folder you can select the newly created Data folder.
1.2 If you are using only Linux machines, like myself, it’s recommended to use NFS type shared folder, so go ahead and enable NFS share by going to Services -> NFS -> Settings. NFS is way faster on Linux machines.
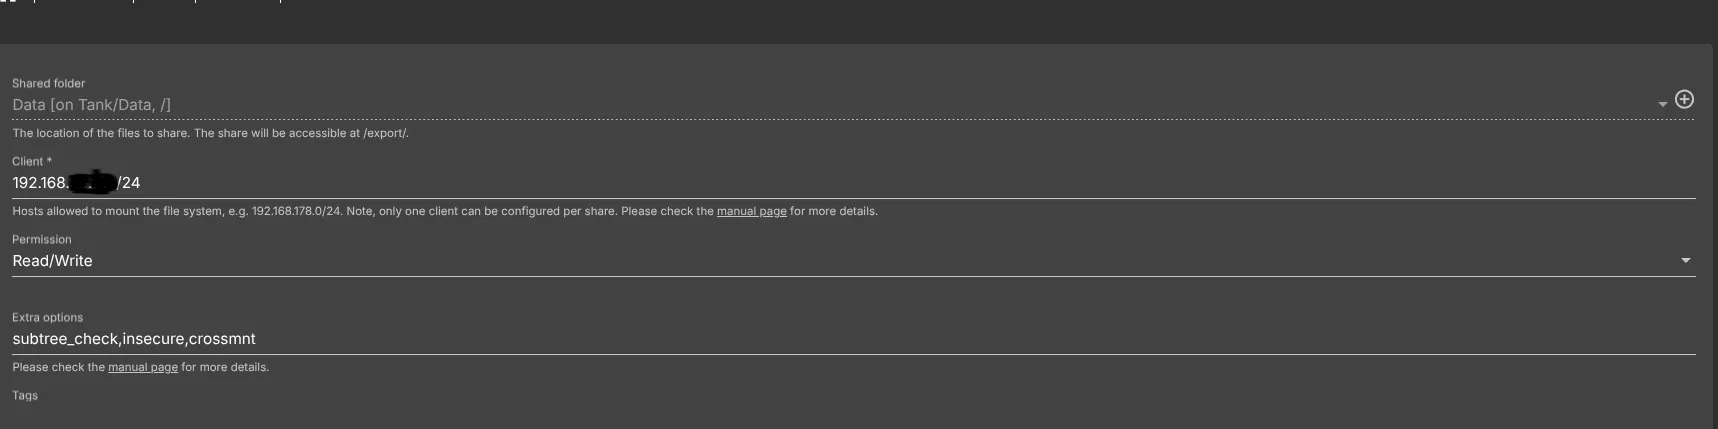
In order to find the client, you can open a terminal and type
ip aLook for your active network interface (e.g., eth0 or wlan0)
You’ll see something like:
inet 192.168.1.42/24That /24 means your subnet is 192.168.1.42/24
This subnet you are going to input in the Client field.
Hit Save and apply Pending configuration changes.
Now you can safely go to your File Manager and:
-
If you are on Windows, input in the File Path
\\192.168.178.4\hit Enter and you are going to see the Data folder -
If you are on Linux and using the default file manager of GNOME, Nautilus, you can find it available on Current Network by going to the Network tab
At the end of this post, let’s make a recap of what we’ve learned
- we installed OMV from scratch on a server, personalized our dashboard and did a full system upgrade
- we installed recommended plugins to extend the functionality of our NAS and also, installed the Proxmox kernel to fully take advantage of the ZFS filesystem
- we created dedicated users for NAS admin, file management and even container management for docker. It’s never recommended to use the root user.
- we have formated our data storage in ZFS format for easy use of snapshots and organized it in a RAID system.


